Air Filter Replacement: A Simple DIY Project for Better Air Quality
22 November 2025 by Zuzanna H.Clean air is essential to the health and comfort of your home. One simple way to ensure that your indoor air quality remains high is by regularly replacing your air filter. This DIY project can greatly improve the efficiency of your HVAC system and help to reduce allergens and pollutants in the air you breathe. In this article, we will go over the importance of a clean air filter, how to choose the right one for your needs, the tools and materials needed for replacement, a step-by-step guide to completing the project, troubleshooting common issues that may arise, and tips for maintaining your new air filter for long-term success.

Understanding the Importance of a Clean Air Filter
A clean air filter is essential for maintaining good air quality in your home. The air filter in your HVAC system plays a crucial role in removing dust, pollen, pet dander, and other airborne particles from the air, ensuring that you and your family breathe in clean and healthy air. A dirty air filter can lead to poor indoor air quality, which can exacerbate allergies, asthma, and other respiratory issues. Additionally, a clogged air filter can put extra strain on your HVAC system, reducing its efficiency and increasing energy bills. Therefore, it is important to regularly replace your air filter to maintain good air quality and keep your HVAC system running smoothly.Choosing the Right Air Filter for Your Needs
When it comes to choosing the right air filter for your home, it's important to consider your specific needs and the air quality in your living space. There are various types of air filters available on the market, each designed to target different types of pollutants and allergens. It's crucial to understand the differences between these filters and select the one that best suits your requirements. Keep in mind factors such as the size of your home, the presence of pets, and any allergies or respiratory issues among household members. By choosing the right air filter, you can ensure that your indoor air quality is improved and that your family can breathe cleaner, healthier air.Tools and Materials Needed for Air Filter Replacement
When it comes to replacing your air filter, there are a few tools and materials that you will need to ensure a successful and efficient process. It's important to gather these items before beginning the replacement to avoid any unnecessary delays. Some of the essential tools and materials you will need include a new air filter that is compatible with your HVAC system, a screwdriver or wrench for removing the filter housing, a vacuum cleaner or rag for cleaning any accumulated dust and debris, and a marker or label for noting the date of replacement. Additionally, it's recommended to have a flashlight on hand to provide better visibility in the area where the air filter is located. By having these tools and materials ready, you will be well-prepared to complete the air filter replacement with ease.Step-by-Step Guide to Replacing Your Air Filter
Replacing your air filter is a relatively simple and quick task that can greatly improve the air quality in your home. Here is a step-by-step guide to help you through the process:1. Turn off the HVAC system: Before you begin, make sure to turn off your heating or air conditioning system to ensure safety and prevent any dust or debris from circulating throughout your home.
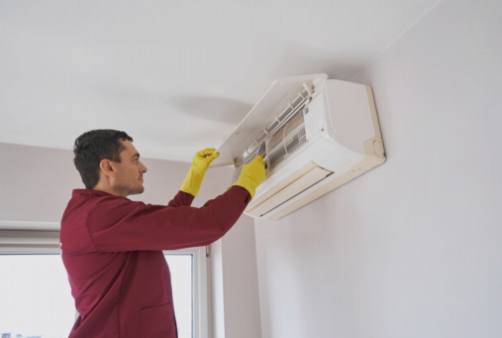
2. Locate the old air filter: The air filter is typically located behind a vent or grille in the walls, ceiling, or floor of your home. It may also be located inside your HVAC system. Once you've located the old filter, carefully remove it from its housing.
3. Check the size and type: Before purchasing a new air filter, make sure to check the size and type of the old filter. This information should be printed on the side of the old filter or can be found in the owner's manual of your HVAC system.
4. Purchase a new air filter: Once you've determined the correct size and type of air filter, purchase a new one from your local hardware or home improvement store. There are various types of air filters available, so choose one that best fits your needs and budget.
5. Install the new air filter: Carefully slide the new air filter into the housing, making sure it fits securely. Pay attention to the direction of the airflow arrows on the filter, as it should be installed in the same direction as the old filter.
6. Secure the filter housing: Once the new air filter is in place, secure the filter housing or grille back into its original position, making sure it is properly sealed.
7. Turn on the HVAC system: After the new air filter is installed, you can turn on your heating or air conditioning system to start enjoying better air quality in your home. Following these simple steps will help you replace your air filter efficiently and ensure that your HVAC system is running at its best to provide clean and healthy air for you and your family.